[Published in Open Source For You (OSFY) magazine, June 2017 edition.]
Introduction
In this fourth article in the DevOps series, we will learn to install RabbitMQ using Ansible. RabbitMQ is a free and open source message broker system that supports a number of protocols such as the Advanced Message Queuing Protocol (AMQP), Streaming Text Oriented Messaging Protocol (STOMP) and Message Queue Telemetry Transport (MQTT). The software has support for a large number of client libraries for different programming languages. RabbitMQ is written using the Erlang programming language and is released under the Mozilla Public License.
Setting it up
A CentOS 6.8 virtual machine (VM) running on KVM is used for the installation. Do make sure that the VM has access to the Internet. The Ansible version used on the host (Parabola GNU/Linux-libre x86_64) is 2.2.1.0. The ansible/ folder contains the following files:
ansible/inventory/kvm/inventory
ansible/playbooks/configuration/rabbitmq.yml
ansible/playbooks/admin/uninstall-rabbitmq.yml
The IP address of the guest CentOS 6.8 VM is added to the inventory file as shown below:
rabbitmq ansible_host=192.168.122.161 ansible_connection=ssh ansible_user=root ansible_password=passwordAlso, add an entry for the rabbitmq host in the /etc/hosts file as indicated below:
192.168.122.161 rabbitmqInstallation
RabbitMQ requires the Erlang environment, and uses the Open Telecom Platform (OTP) framework. There are multiple sources for installing Erlang - the EPEL repository, Erlang Solutions, zero-dependency Erlang provided by RabbitMQ. In this article, we will use the EPEL repository for installing Erlang.
---
- name: Install RabbitMQ server
  hosts: rabbitmq
  gather_facts: true
  tags: [server]

  tasks:
    - name: Import EPEL GPG key
      rpm_key:
        key: http://dl.fedoraproject.org/pub/epel/RPM-GPG-KEY-EPEL-6
        state: present

    - name: Add YUM repo
      yum_repository:
        name: epel
        description: EPEL YUM repo
        baseurl: https://dl.fedoraproject.org/pub/epel/$releasever/$basearch/
        gpgcheck: yes

    - name: Update the software package repository
      yum:
        name: '*'
        update_cache: yes

    - name: Install RabbitMQ server
      package:
        name: "{{ item }}"
        state: latest
      with_items:
        - rabbitmq-server

    - name: Start the RabbitMQ server
      service:
        name: rabbitmq-server
        state: started

    - wait_for:
        port: 5672
After importing the EPEL GPG key and adding the EPEL repository to the system, the yum update command is executed. The RabbitMQ server and its dependencies are then installed. We wait for the RabbitMQ server to start and to listen on port 5672. The above playbook can be invoked as follows:
$ ansible-playbook -i inventory/kvm/inventory playbooks/configuration/rabbitmq.yml --tags "server"Dashboard
The RabbitMQ management user interface (UI) is available through plugins.
- name: Start RabbitMQ Management UI
  hosts: rabbitmq
  gather_facts: true
  tags: [ui]

  tasks:
    - name: Start management UI
      command: /usr/lib/rabbitmq/bin/rabbitmq-plugins enable rabbitmq_management

    - name: Restart RabbitMQ server
      service:
        name: rabbitmq-server
        state: restarted

    - wait_for:
        port: 15672

    - name: Allow port 15672
      shell: iptables -I INPUT 5 -p tcp --dport 15672 -m state --state NEW,ESTABLISHED -j ACCEPT
After enabling the management plugin, the server needs to be restarted. Since we are running it inside the VM, we need to allow the management user interface (UI) port 15672 through the firewall. The playbook invocation to set up the management UI is given below:
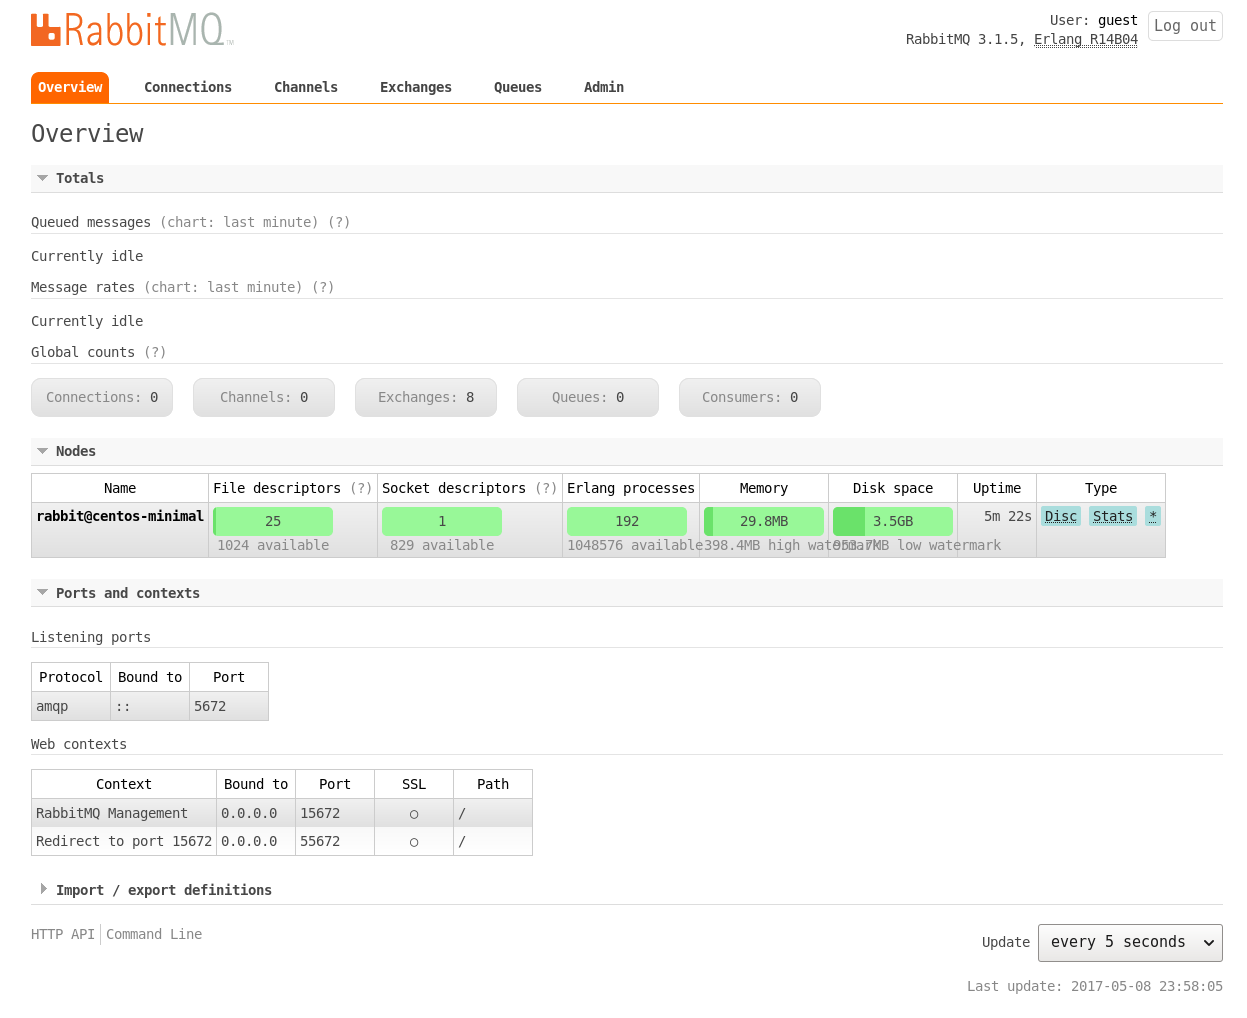
$ ansible-playbook -i inventory/kvm/inventory playbooks/configuration/rabbitmq.yml --tags "ui"The default user name and password for the dashboard are ‘guest:guest’. From your host system, you can start a browser and open http://192.168.122.161:15672 to view the login page as shown in Figure 1. The default ‘Overview’ page is shown in Figure 2.
Ruby
We will use a Ruby client example to demonstrate that our installation of RabbitMQ is working fine. The Ruby Version Manager (RVM) will be used to install Ruby as shown below:
- name: Ruby client
  hosts: rabbitmq
  gather_facts: true
  tags: [ruby]

  tasks:
    - name: Import key
      command: gpg2 --keyserver hkp://keys.gnupg.net --recv-keys 409B6B1796C275462A1703113804BB82D39DC0E3

    - name: Install RVM
      shell: curl -sSL https://get.rvm.io | bash -s stable

    - name: Install Ruby
      shell: source /etc/profile.d/rvm.sh && rvm install ruby-2.2.6

    - name: Set default Ruby
      command: rvm alias create default ruby-2.2.6

    - name: Install bunny client
      shell: gem install bunny --version ">= 2.6.4"
After importing the required GPG keys, RVM and Ruby 2.2.6 are installed on the CentOS 6.8 VM. The bunny Ruby client for RabbitMQ is then installed. The Ansible playbook to setup Ruby is given below:
$ ansible-playbook -i inventory/kvm/inventory playbooks/configuration/rabbitmq.yml --tags "ruby"We shall create a ‘temperature’ queue to send the values in Celsius. The consumer.rb code to receive the values from the queue is given below:
#!/usr/bin/env ruby

require "bunny"

conn = Bunny.new(:automatically_recover => false)
conn.start

chan  = conn.create_channel
queue = chan.queue("temperature")

begin
  puts " ... waiting. CTRL+C to exit"
  queue.subscribe(:block => true) do |info, properties, body|
    puts " Received #{body}"
  end
rescue Interrupt => _
  conn.close

  exit(0)
end
The producer.rb code to send a sample of five values in degree Celsius is as follows:
#!/usr/bin/env ruby

require "bunny"

conn = Bunny.new(:automatically_recover => false)
conn.start

chan   = conn.create_channel
queue   = chan.queue("temperature")

values = ["33.5", "35.2", "36.7", "37.0", "36.4"]

values.each do |v|
  chan.default_exchange.publish(v, :routing_key => queue.name)
end
puts "Sent five temperature values."

conn.close
As soon as you start the consumer, you will get the following output:
$ ruby consumer.rb
 ... waiting. CTRL+C to exit
You can then run the producer.rb script that writes the values to the queue:
$ ruby producer.rb

Sent five temperature values.
The received values at the consumer side are printed out as shown below:
$ ruby consumer.rb
... waiting. CTRL+C to exit
Received 33.5
Received 35.2
Received 36.7
Received 37.0
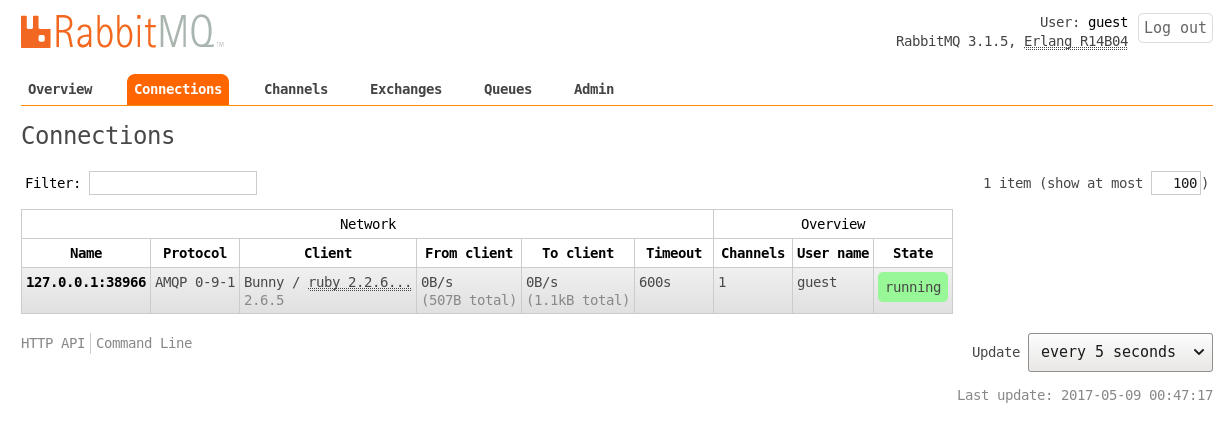
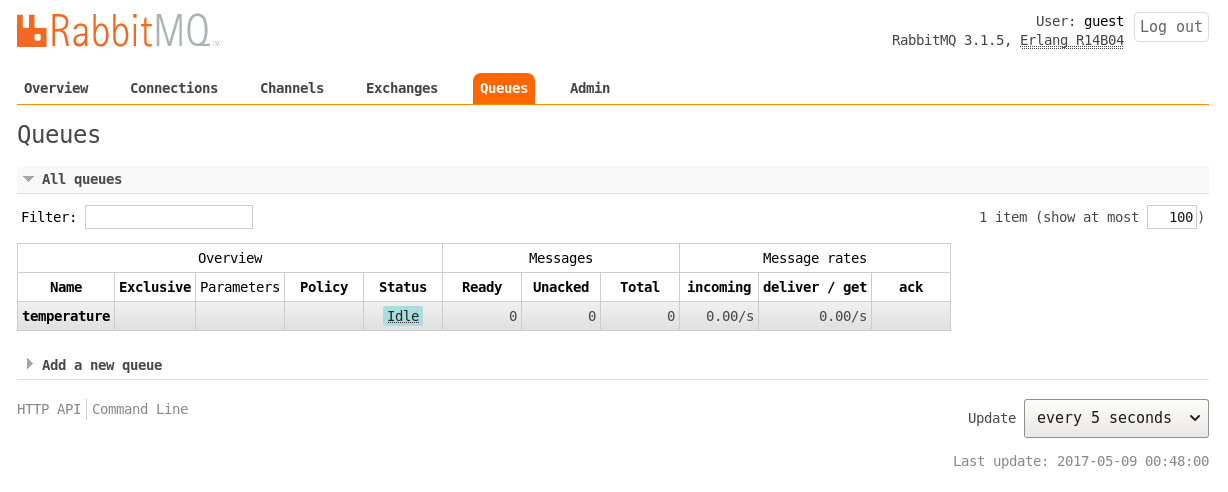
Received 36.4We can observe the available connections and the created queue in the management user interface as shown in Figure 3 and Figure 4, respectively.
Uninstall
It is good to have an uninstall script to remove the RabbitMQ server for administrative purposes. The Ansible playbook for the same is available in the playbooks/admin folder and is shown below:
---
- name: Uninstall RabbitMQ server
  hosts: rabbitmq
  gather_facts: true
  tags: [remove]

  tasks:
    - name: Stop the RabbitMQ server
      service:
        name: rabbitmq-server
        state: stopped

    - name: Uninstall rabbitmq
      package:
        name: "{{ item }}"
        state: absent
      with_items:
        - rabbitmq-server
The script can be invoked as follows:
$ ansible-playbook -i inventory/kvm/inventory playbooks/admin/uninstall-rabbitmq.ymlYou are encouraged to read the detailed documentation at https://www.rabbitmq.com/documentation.html to know more about the usage, configuration, client libraries and plugins available for RabbitMQ.